Audio Clients
Available Clients
There are two audio clients available for use on VATSIM:
-
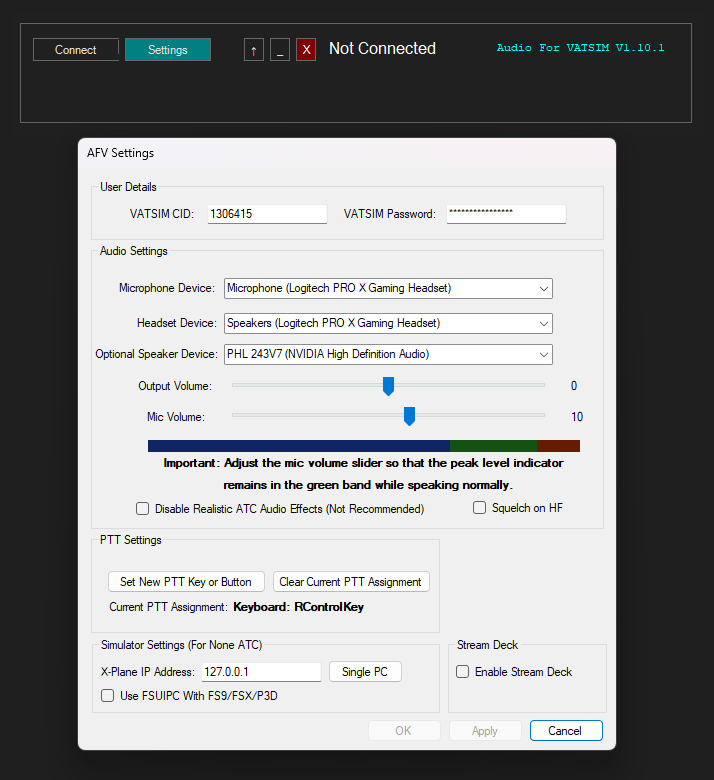
Audio for VATSIM
-
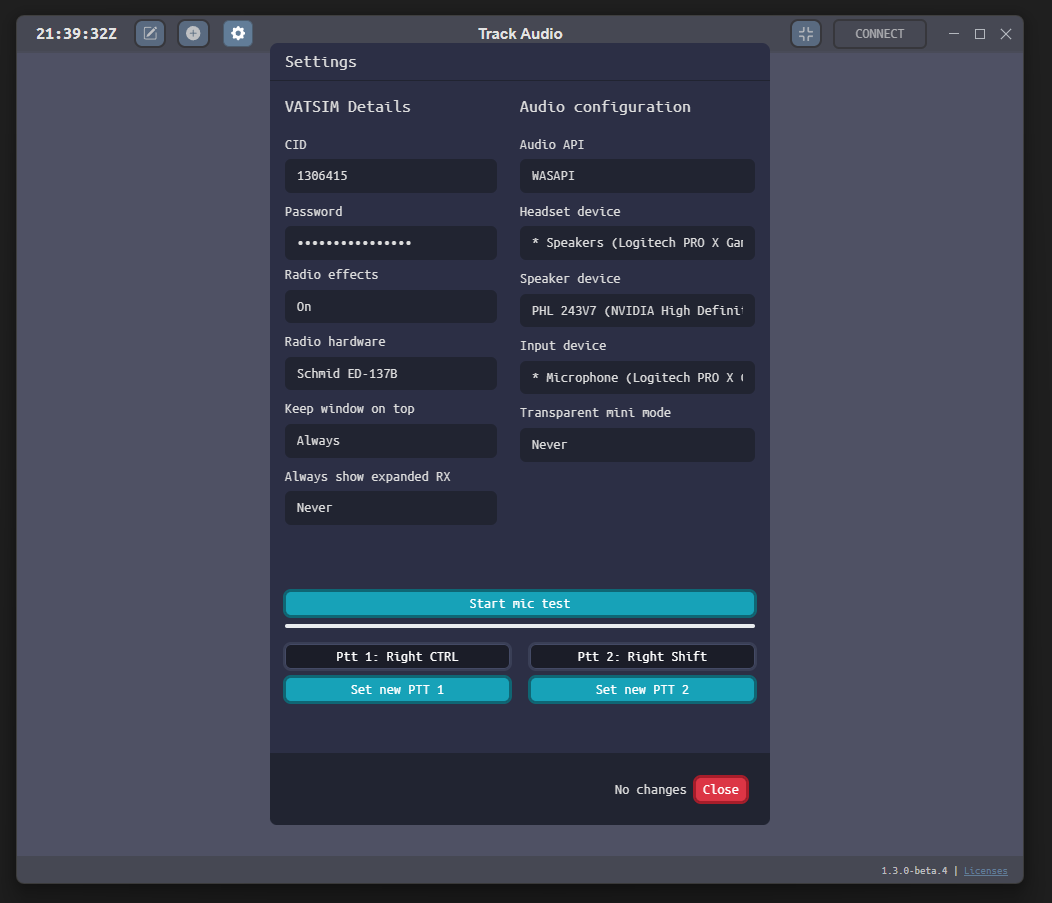
Track Audio
Setting Up the Audio Client
- Install the chosen client and open the settings menu.
- Input your credentials and configure audio devices:
- Enter your VATSIM CID and password.
- Set your input (microphone) and output (headset/speakers) devices.
- Audio for VATSIM:
- Adjust the microphone volume to stay within the green band for optimal audio clarity.
- Track Audio:
- The microphone volume is set automatically. Radio hardware selection is user preference, with Schmid ED-137B recommended.
- Set a Push-to-Talk (PTT) key:
- Choose a key that won't conflict with other activities.
- Track Audio only: Disconnect any joysticks, as they may interfere with PTT functionality.
- Press OK to save your settings.
- Important: Settings changes can only be made when disconnected from the client.
Using the Audio Client
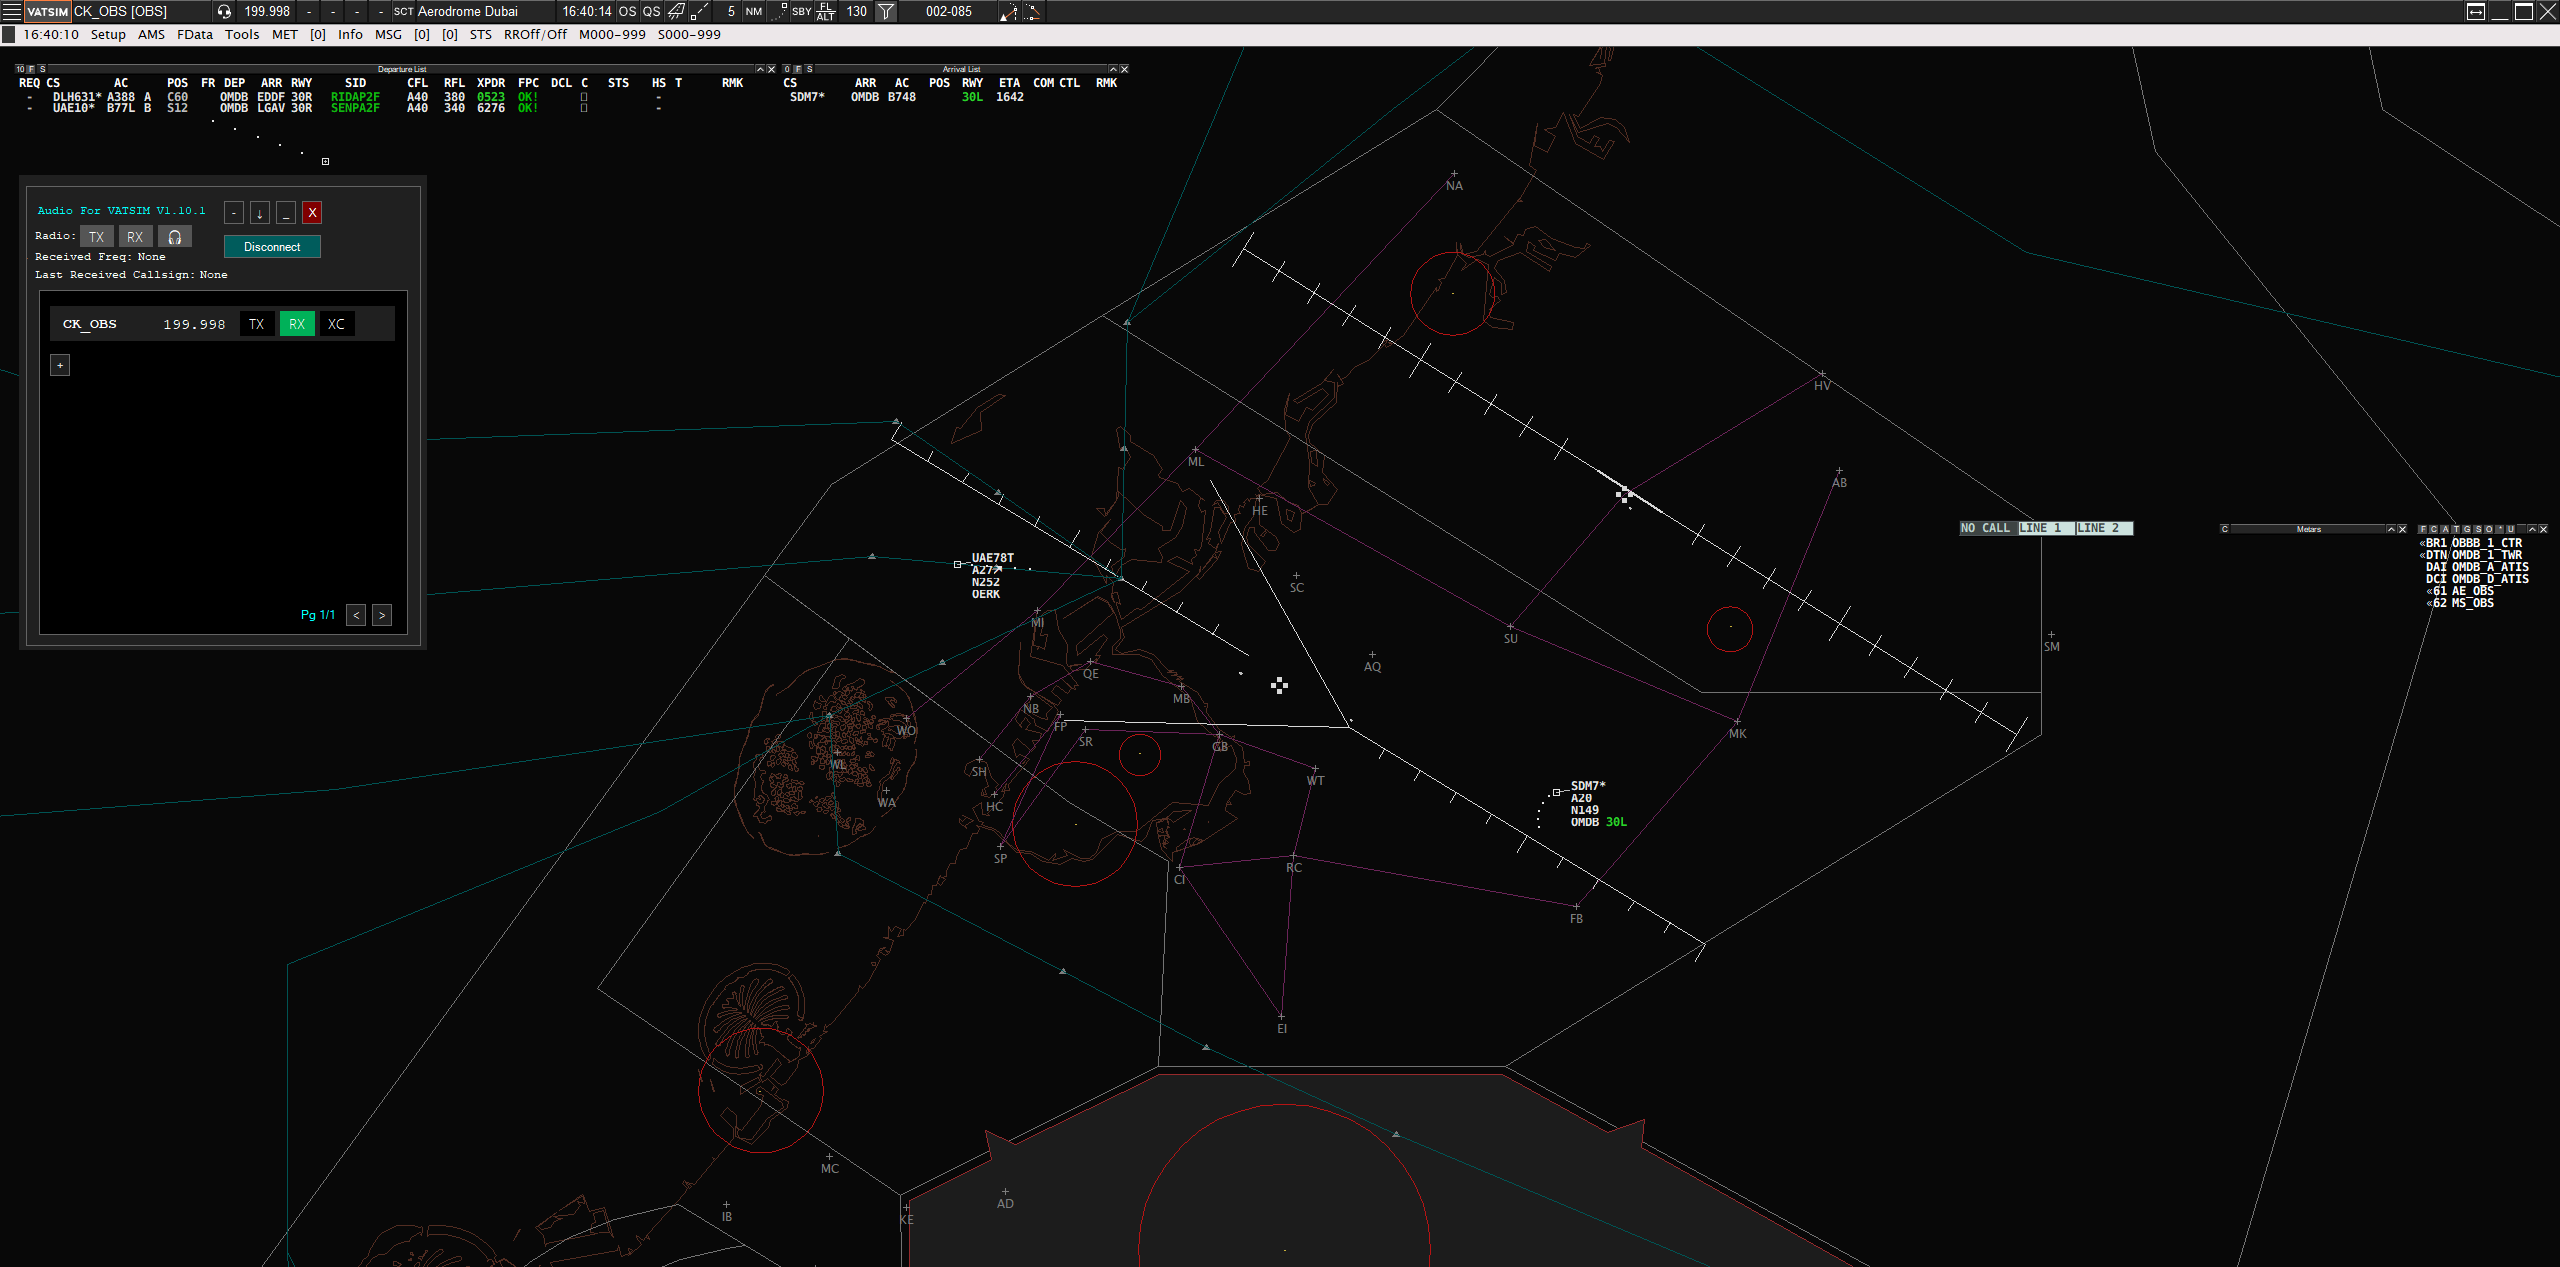
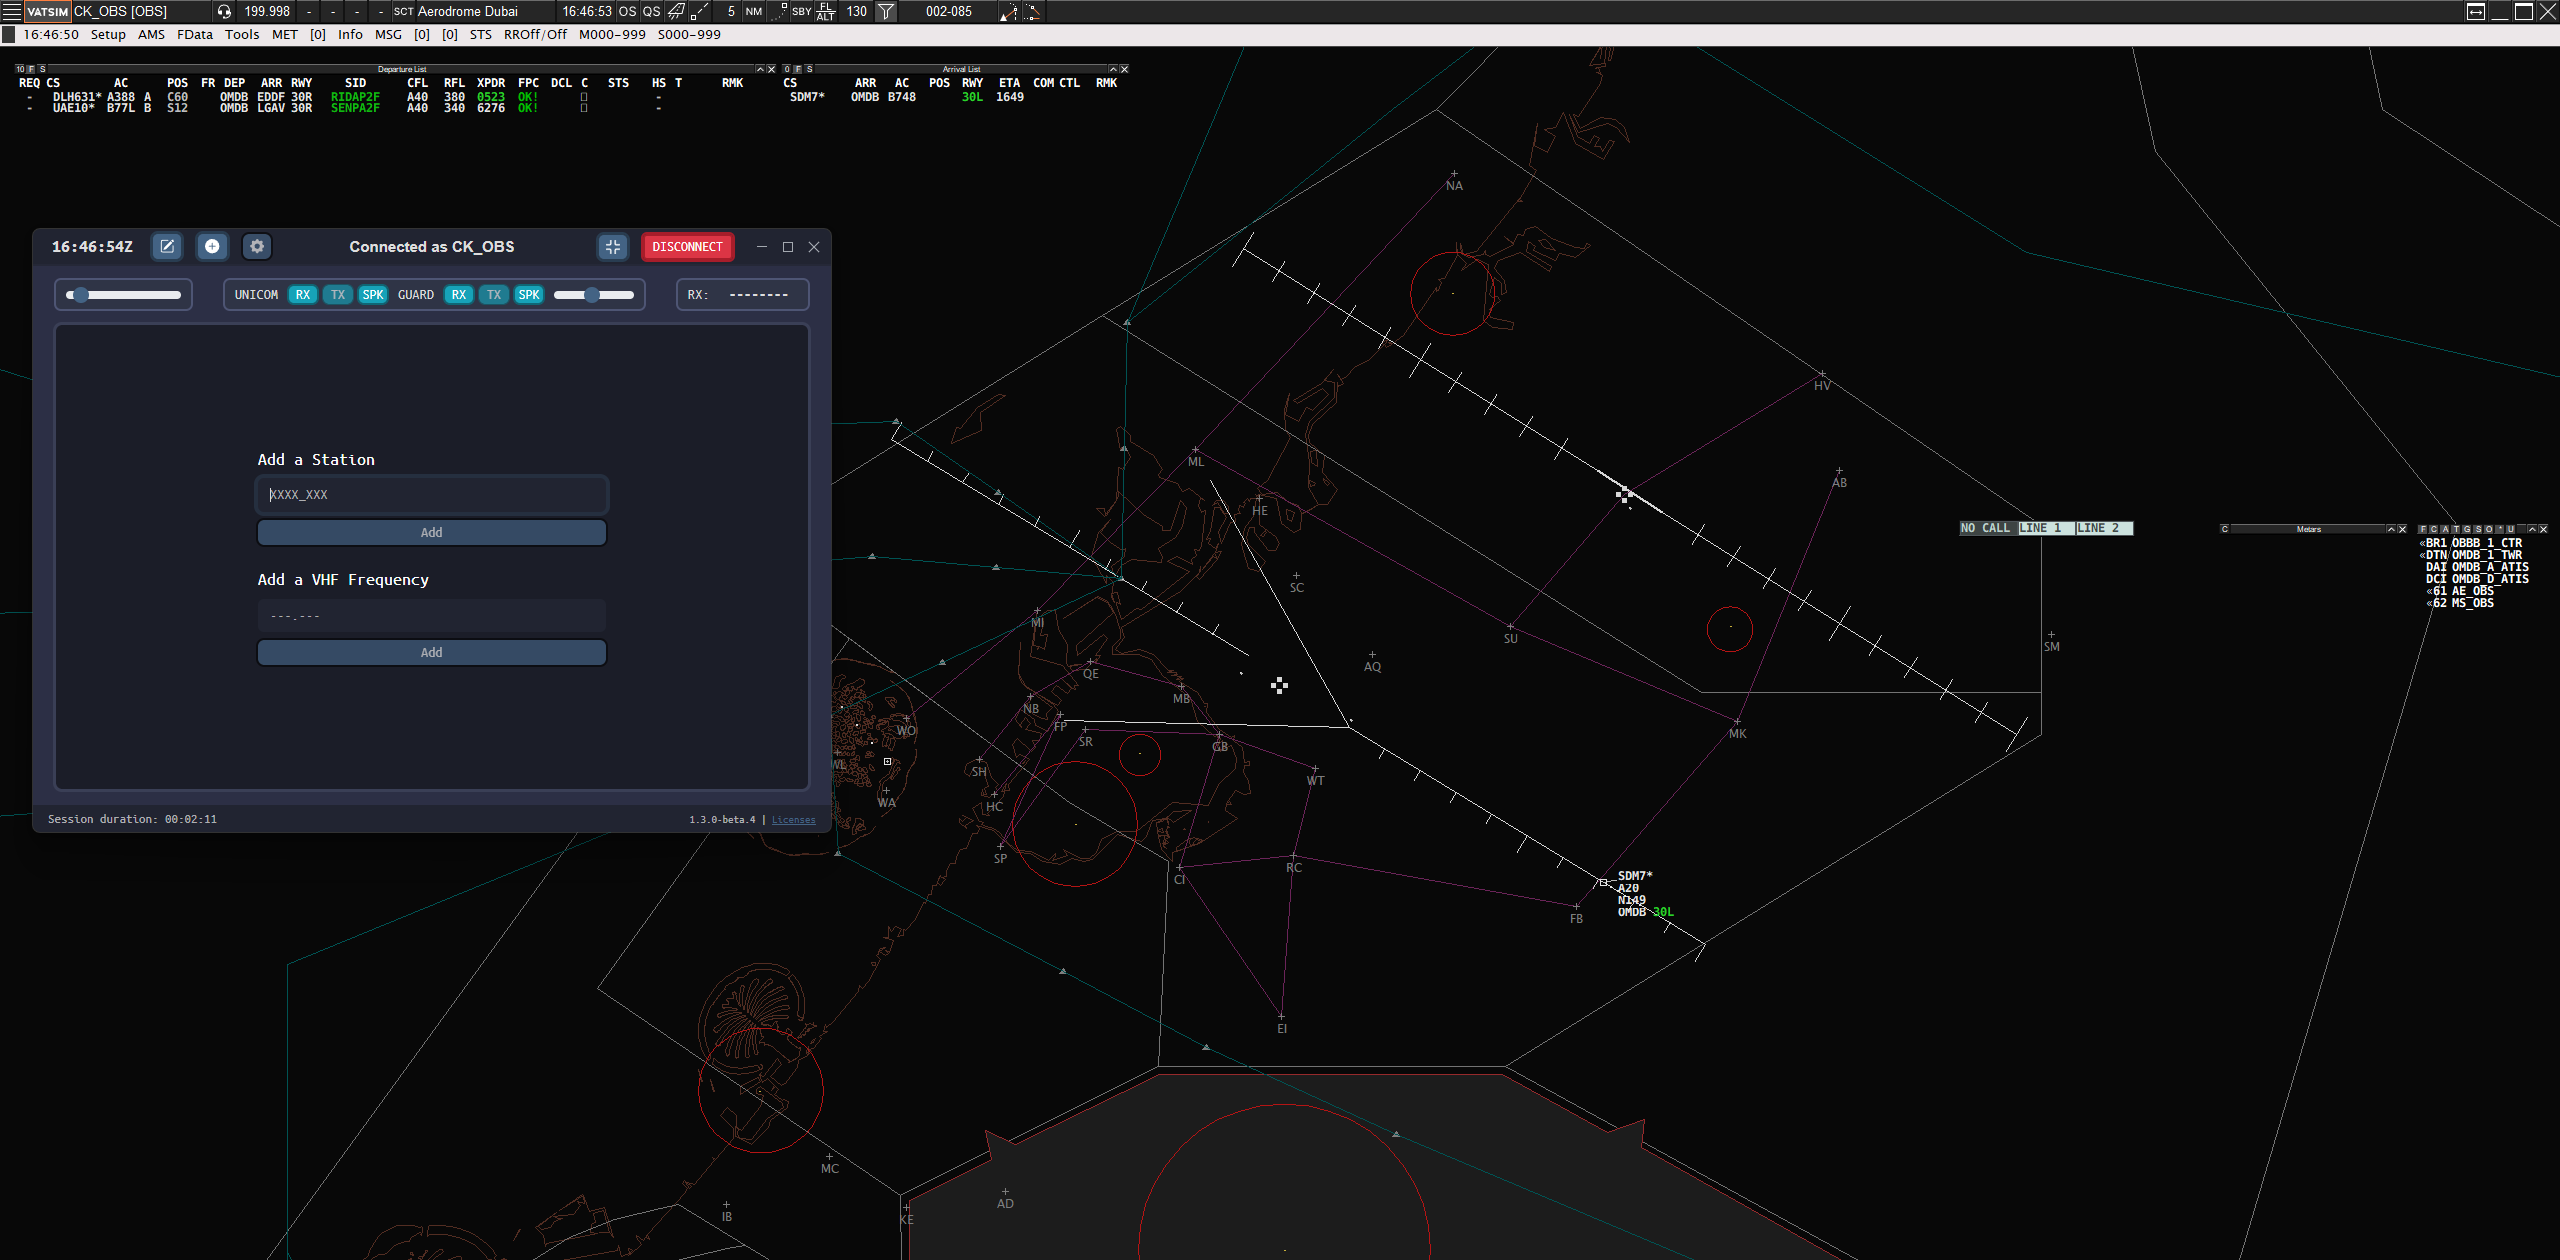
Observer Mode
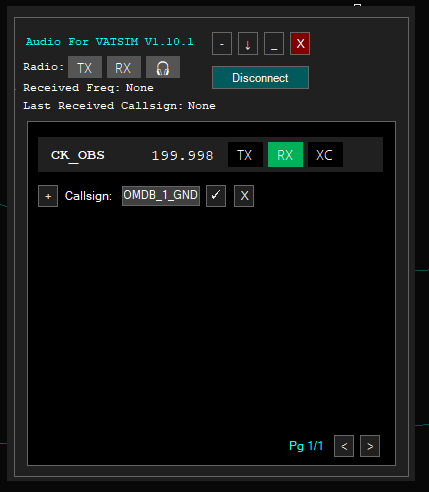
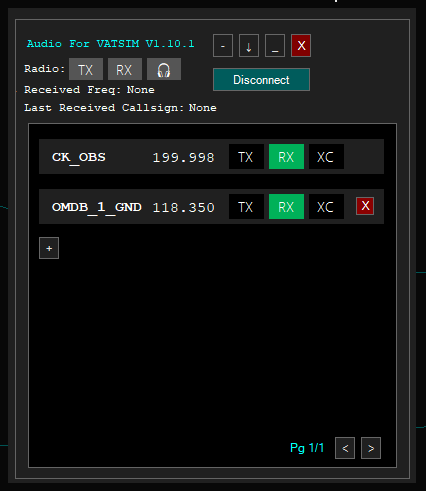
- Audio for VATSIM:
- Ensure you are connected to VATSIM via EuroScope.
- Click Connect in the Audio for VATSIM client.
- Your observer callsign (e.g.,
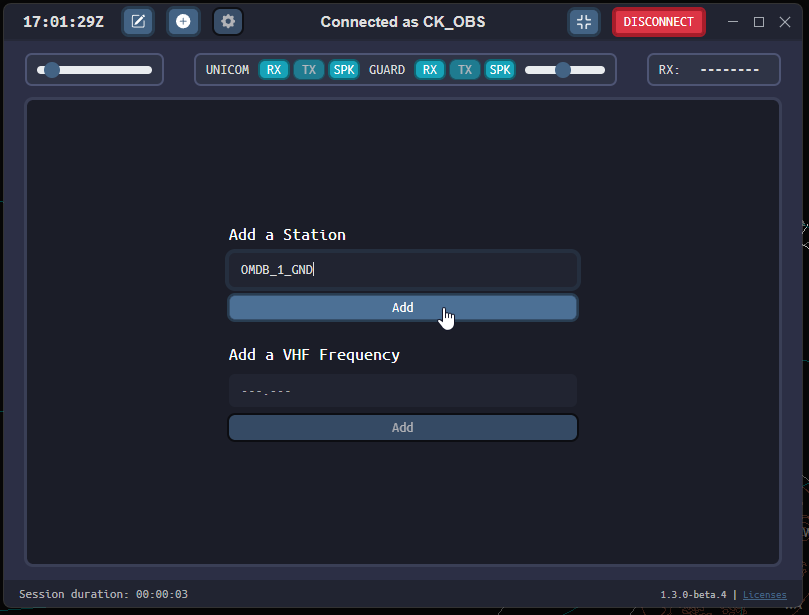
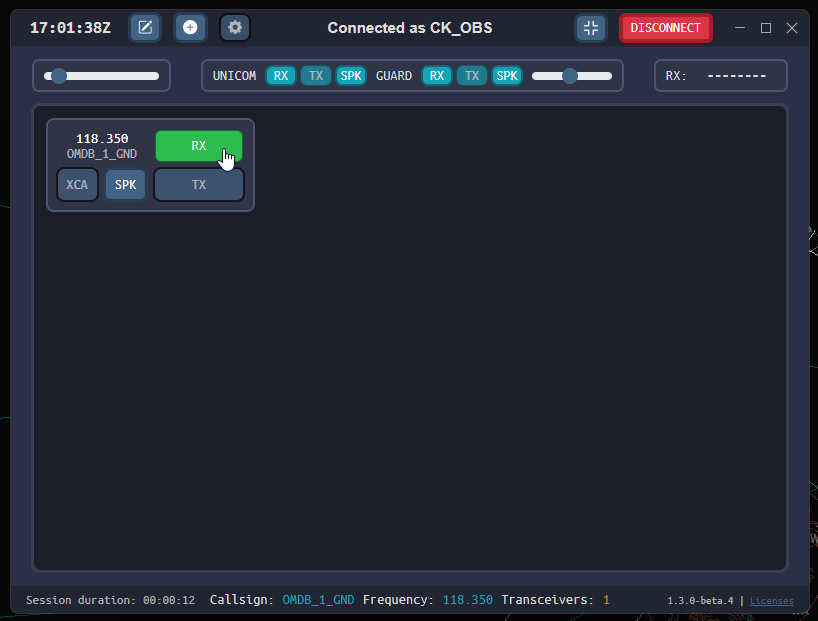
JK_OBS) and frequency199.998will appear. - To listen to a frequency:
- Click the + button and type the position callsign (e.g.,
DOH_R1_APP). - Press RX on the frequency you added to start listening.
- Click the + button and type the position callsign (e.g.,
- Track Audio:
- Ensure you are connected to VATSIM via EuroScope.
- Click Connect in the Track Audio client.
- Your observer callsign (e.g.,
JK_OBS) will display at the top. - To listen to a frequency:
- Enter the position callsign under Add a Station and press Add.
- Press RX on the frequency to start listening.
Controller Mode
- Log in to EuroScope and connect to your controlling position.
- Open the audio client, which will automatically:
- Detect your position.
- Add relevant frequencies to your session.
- Transmit and Receive:
- Press TX to transmit and RX to receive on a frequency.
- Cross-Coupling Frequencies:
- Audio for VATSIM: Use the XC button.
- Track Audio: Use the XCA button.
- Cross-coupling ensures pilots in different areas of your airspace can hear each other, reducing blocked transmissions.
- Audio Output Control:
- Audio for VATSIM: Press the speaker icon to transfer output from headset to speakers.
- Track Audio: Press SPK for the same functionality.
- Additional Features (Track Audio Only):
- RX/TX on UNICOM and GUARD frequencies. However, only TX on those frequencies when you have the intention to TX on them!